Install a Plugin using Upload Method in WordPress Admin Panel
First you would need to download the plugin from the source (which will be a zip file), then go to your WordPress admin panel. Click on Plugin » Add New. Then click on the Upload Tab.

You will see a screen like the one above. Browse the file and upload it (zip files only). You will be taken to the activate a plugin page just like this one:

Make sure that you click on Activate the plugin, now you have installed the WordPress plugin. You would have to configure the settings to fit your needs. These settings will vary for each plugin therefore we will not be covering that in this post.
Install a Plugin using FTP Manager
If you are very new to web and have no idea what an FTP Manager is, then this option is not for you. The FTP manager method is the least friendly for beginners out of the three method that we shared in this post. You would need to access your host through the FTP manager. Access the path (/wp-content/plugins/) And upload plugin folder there.
you can download the filezilla program to access to your FTP, The above screenshot is of a FTP software known as FileZilla program. You can simply drag and drop plugin files. You must make sure that you upload the unzipped folder. Once you have uploaded, then you would need to click on the Plugins tag in your WordPress admin panel.
You will see the plugin you just uploaded. Click on the Activate button and you are done
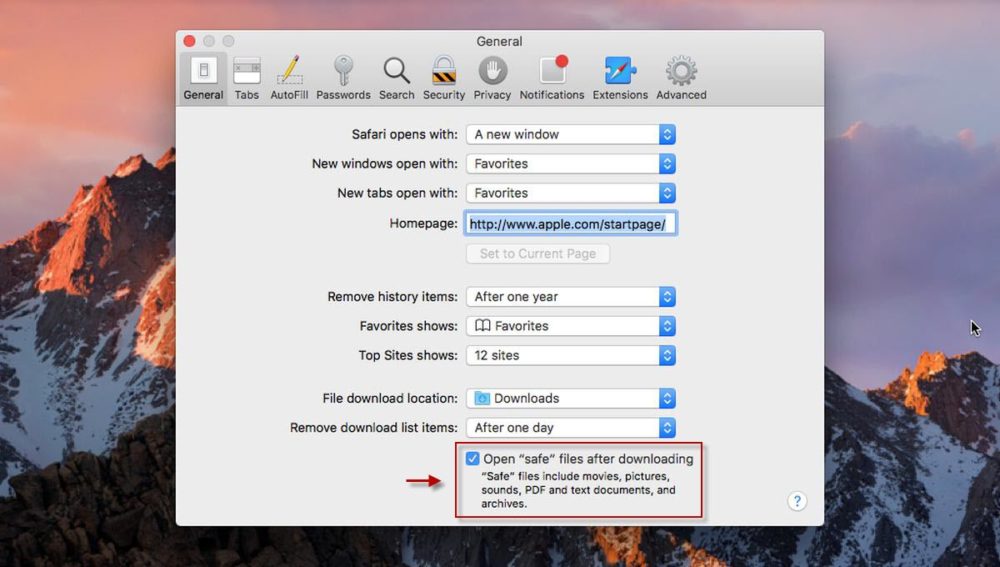
- Open Safari
- Click Preferences
- Under the General tab, uncheck the option Open “safe” files after downloading

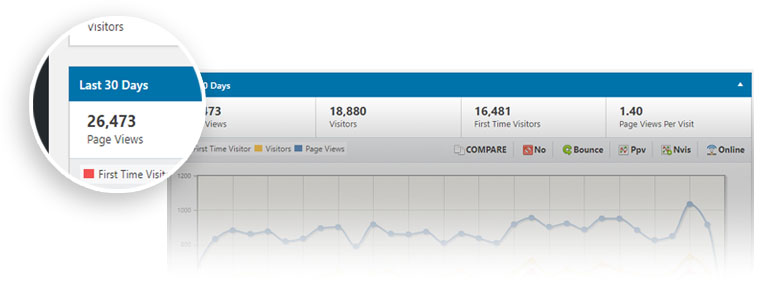
- Total visitors: A visitor is someone who visits your site, A single visitor can have multiple visits to your site.
- Page views (visits): is any time a visitor reaches your site from somewhere outside of your website domain.
- Page Views Per Visit: is the average percentage between the visitors and visits

This feature allows you to identify the geographical location of visitors to your site and their internet service provider (ISP). this tool can be useful in identifying if you need to be catering more toward international visitors.
Display the current day statistics, The visitors, visits, new visitors for every hour and the online users (this is real time counter), Also you can compare the using the ![]() tool:
tool:
 Bounce rate : It represents the percentage of visitors who enter the site and then leave (“bounce”) rather than continuing on to view other pages within the same site.
 Page views : To compare the results with the page views per visitor
 New Visitors : To compare the results with the new visitors
 Online visitors : To compare the results with the online visitors
 Previous day, week, to weeks : To compare the results with the previous day or the previous week etc..
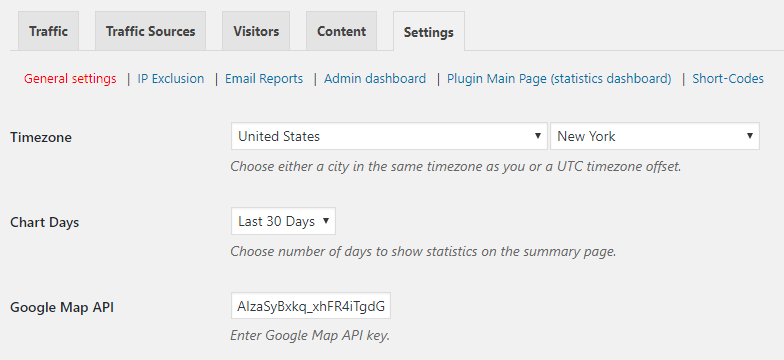
General Settings
Timezone: To change your default timezone (just choose your country and city)
Chart Days: Using this option, you will be able to change the default days count (30 day) to be two weeks, one month, 45 day or 60 day
Google Map API: To use the Google Maps JavaScript API, you must register your app project on the Google API Console and get a Google API key which you can add to your app.
(please use this default key AIzaSyBxkq_xhFR4iTgdGUvMw5QXgg5_k_2A-4I), or click here to add your own API key